Quick Start
Summary
File and database locations
|
Server |
Local PC |
|
SQL server databases created myData shared directory chosen myData config file created Licence file/serial number ready |
net framework installed myData installed Connection to databases via myData Admin Utility |
Notes
- myData needs to be installed on the server in the C:\myDataSharedDirectory.
- Create and copy the config files (Production, Test and Training) and the licence file to this directory.
- The .net Framework and myData need to be installed on each user PC.
This will need to be done when logged into the PC with administrator privileges. - myData Version Updates: From time to time Version updates are provided.
This can be checked in myData using Help and Check for Updates.
Download the update and copy to the server.
Then run the update file and use the myData Admin utility to update the database for each of the configurations (Production, Test and Training).
Refer to Section on myData Version Updates.
Server
The server is responsible for providing database and file access.
This allows system administrators to maintain and backup their data centrally.
The myData application then utilises User's network to access asset data and present information on the client side.
Database Server
- SQL Server 2008R2-2018 Standard Edition or above
- With SQL Server Analysis Services
- SQL Server 2008 requires Microsoft .NET Framework 3.5 (Full)
- SQL Server 2012 requires Microsoft .NET Framework 4.0 (Full)
- SQL Server 2018 requires Microsoft .NET Framework 4.0 (Full)
- Server stored in a secure location, ideally in a dedicated server room with sufficient air conditioning and provision redundancy (UPS, backup power generator)
- Tape drive/network backup and procedures in place
- Windows® 2008/2012 Server Editions
- Intel™ quad core or similar processor
- 8GB of System Memory
- 20GB of Free hard drive space (Additional space required for backups)
Create config files for Production, Test and Training (e.g. Production.config, Train.config and Test.config.
These files are created by copying and renaming the supplied config file.
Logon using administrator and copy the config files, licence file, myData installer and .net files to the server.
SQL Server Setup
Assetic myData/myValuer utilises SQL Server database as its main storage.
The system administrator needs to create a separate database with appropriate permissions.
Assetic myData supports both Windows Authentication (preferred) and SQL Server Authentication modes.
Windows Authentication mode requires both the database server and users of myData to be under the same Active Directory (AD) domain.
In SQL Authentication mode, the system administrator needs to create one SQL Database Login that is shared between all users of the myData database.
In Windows Authentication mode, the system administrator can either have one AD Group and map it to one Database Login or add AD Users who require database access to the database server as separate Database Logins.
It is recommended to use one AD Group to simplify configuration and also for better maintenance.
The Database Logins are used to authenticate users to the database server.
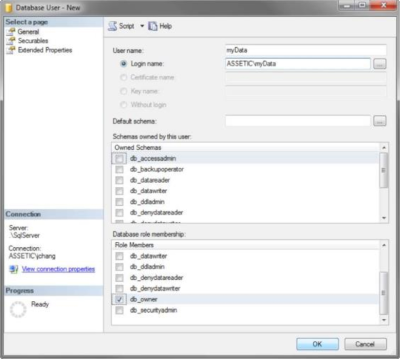
The system administrator needs to map Database Logins to Database Users to allow access to the myData database.
Normally, Database Users of the myData database should have the db_owner permission.
The following example demonstrates how to create a new database using Microsoft SQL Management Studio:
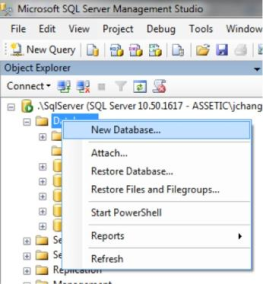
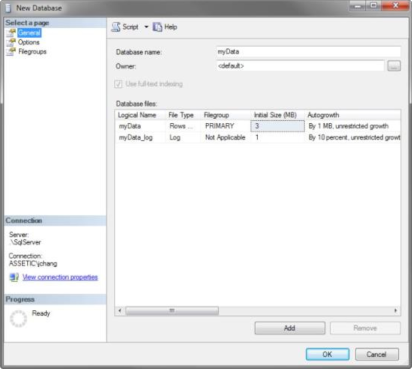
Once the database is created, it is important to ensure appropriate Database Logins are mapped to myData Database Users with the db_owner permission.
Note for DBA: Administrator can further fine tune the permission settings on myData database.
One common use case is only assigning db_datareader and db_datawriter roles to the end users.
Please note that end users will also need the permission to execute stored procedures that are installed by the Admin Utility. (By default, this permission is inherit from public database role)
It is highly recommended to have a database Maintenance Plan to perform regular database backups.
For setting up database backups and more information on database management, please refer to SQL Server Books Online: http://msdn.microsoft.com/en-us/library/ms130214.aspx
Related Topics:
Identity and Access Control: http://msdn.microsoft.com/en-us/library/bb510418.aspx
Maintaining Database: http://msdn.microsoft.com/en-us/library/ms178081.aspx
Global Configuration File
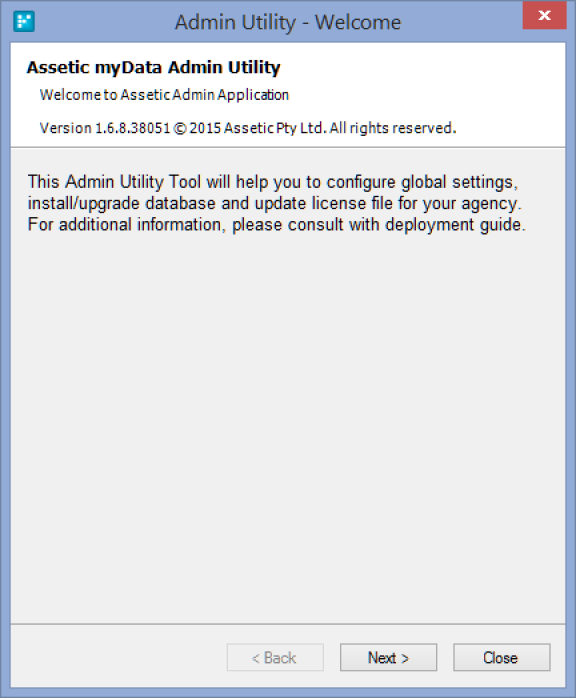
The Admin Utility is used by system administrators to maintain Global Configuration Files and also install database structures for myData.
The administrator should setup one configuration file for each environment (e.g. Testing, Production, Training).
- Open up the start menu and under Assetic SAM
-
 (Windows 8)
 (Windows 7)
 - Open up myData Admin Utility.
The Admin Utility is used by system administrators to maintain Global Configuration Files and also install database structures for myData.
The administrator should setup one configuration file for each environment (e.g. Testing, Production. See Recommended naming of myData databases).
- Open up Windows start menu and select Assetic SAM.
- Open up myData Admin Utility (or myValuer Admin Utility).

- After the Admin Utility is launched, click Next.
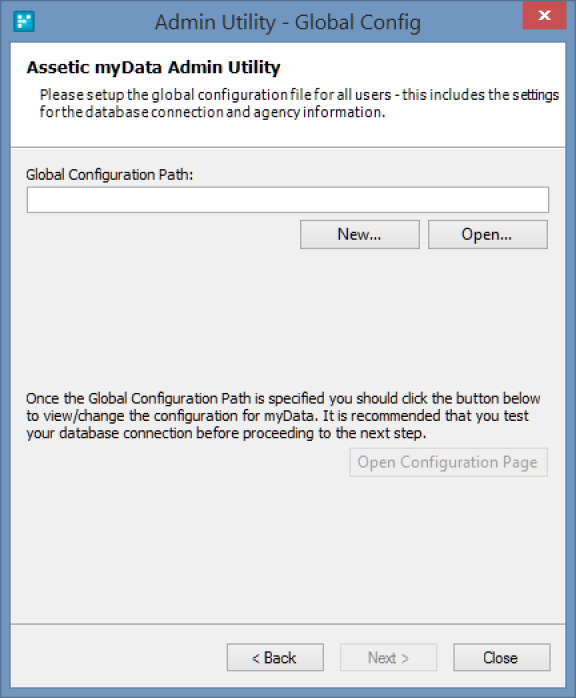
- Under the Global Configuration Path box, click New...
- Type in the intended path for the configuration file (e.g. "S:\MyData\Production.config").

- Click the Open Configuration Page button to configure the details settings that are required to run myData application.
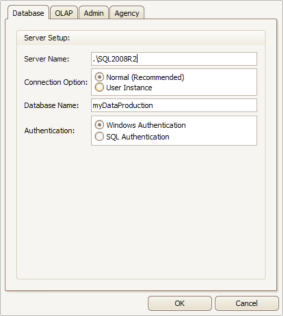
The Database tab contains the settings for SQL Database.
Assetic myData stores its data in the database that is specified in this tab.
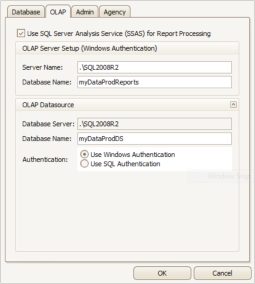
The OLAP tab contains additional settings for connecting to SQL Server Analysis Service (SSAS).
This option can greatly improve Financial Report performance when the system has more than 6000 records.
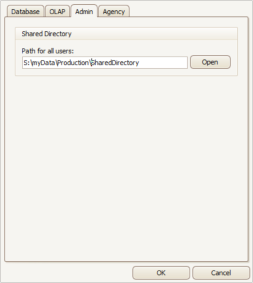
The Admin tab contains the setting for Shared Directory.
This network location is used to store globally shared configuration and files.
ll Users should have full access to this network location.
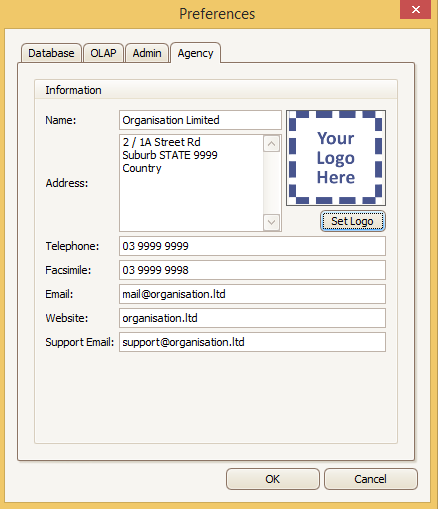
- The Agency tab allows you to
- Enter information about your organisation
- Brand the application your your corporate logo
- Set a custom Support Email address for support requests
This allows organisations to internally triage support requests before they are escalated to Assetic support.
There are three scenarios that generate support emails- User clicks Help - Send Feedback
- User clicks Help - Report Issue
- Pop up error when performing a task
- The default Support Email address (when the field is left blank) is 'support@assetic.com'
- Click OK to save the global configuration and click the Next button.
- Click Install/Upgrade to create all necessary table structures in the database.
Type in the default user name (Admin) and password (Admin).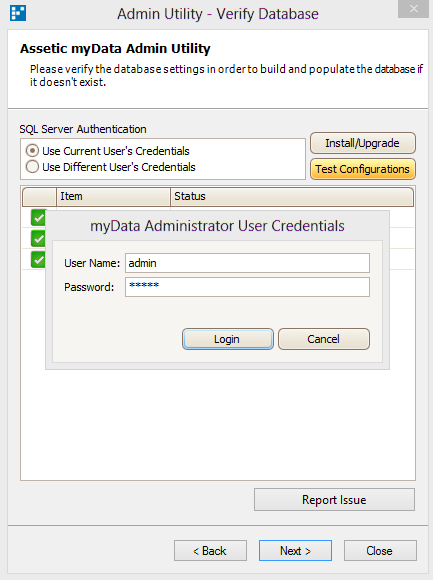
- Once database installation is completed, click Next to apply license to database.
- Enter the licence key and click on Activate button to load the license file that is supplied by Assetic.
It is important that the current User Domain matches with the User Domain in the license files.
User has the choice to upload a licence file.
Click "Close" to finish the configuration step.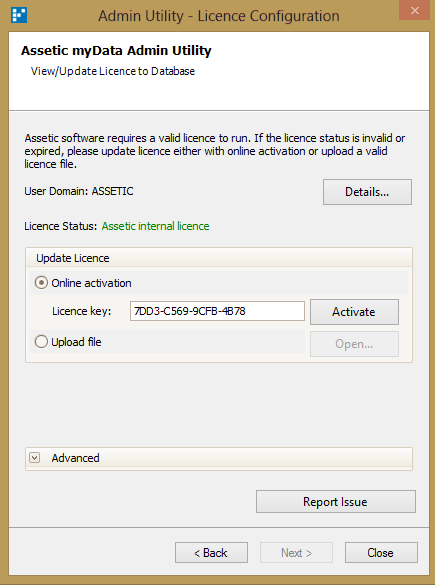
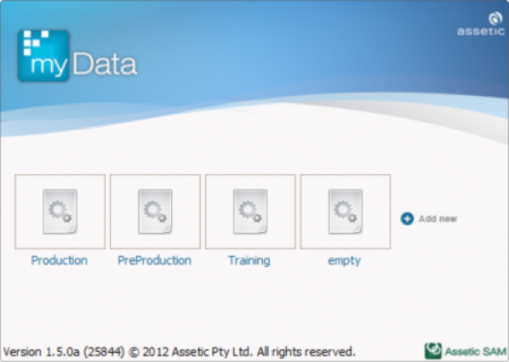
- Launch myData from the Desktop, and when it prompts for the Global Configuration file, use the Configuration file that was created in step 5.
Installing myData for Local Users
The following needs to be installed on every desktop machine that requires access to myData:
- Microsoft .NET Framework 4.0 (Full)
- myData
- Log onto desktop computer using administrator login that enables access to the server
- Go to Remote Desktop Connection under Accessories in the menu (main) Logon to server using same credentials
- Select connect
- Once connected – copy and paste onto desktop the MyData installer and .Net files
- Close the remote desktop connection
- Install .Net file first onto local PC
- Select myData zip file and double click on myData installer
- Run through process
- When process finishes Open myData
 and add a new connection
  by pointing to the appropriate config file on the server (e.g. S:\myData\ myDataSharedDirectory\mydataProducion.config).
This needs to be done for each database/config file - Delete files from desktop
myData Version Updates
From time to time, Assetic releases new software installers to improve software functionality and stability.
This can be checked in myData using Help and Check for Updates.
Download the update and copy to the server. The client software version must be consistent between all workstations.
The new installer can be run on top of the existing installation – it will automatically update the client software to the latest version.
Additionally, the database needs to be upgraded after client software updates are completed.
This is done by using the Admin Utility.
The system administrator should open the Global Configuration File and follow the steps below (Similar to the steps in Section 4)
It is highly recommended that the database is backed up before applying new update.
These database update procedures will only need to be run once for each database (Production, Test and Training) for each new update.
- Open up myData Admin Utility.

(Windows 8)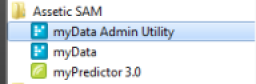
(Windows 7) - After the Admin Utility is launched.
From time to time, Assetic releases new software installers to improve software functionality and stability.
The new installer can be run on top of the existing installation – it will automatically update the client software to the latest version.
The client software version must be consistent between all workstations.
Deployment Guide – Full Version
Refer to myData Deployment Guide:
